Without folders, our designs will be all over the place. Folders help organize our designs and pictures. So we can get them when we need them. 😎
Do remember that folders are available for our Starter, Pro, and Enterprise users.
Here are the steps to arrange your designs inside your custom folders.
Log in
Log into Picmaker and click on the ‘My designs’ tab on the left pane.
This tab will allow you to take a look at all the designs you have created to date.

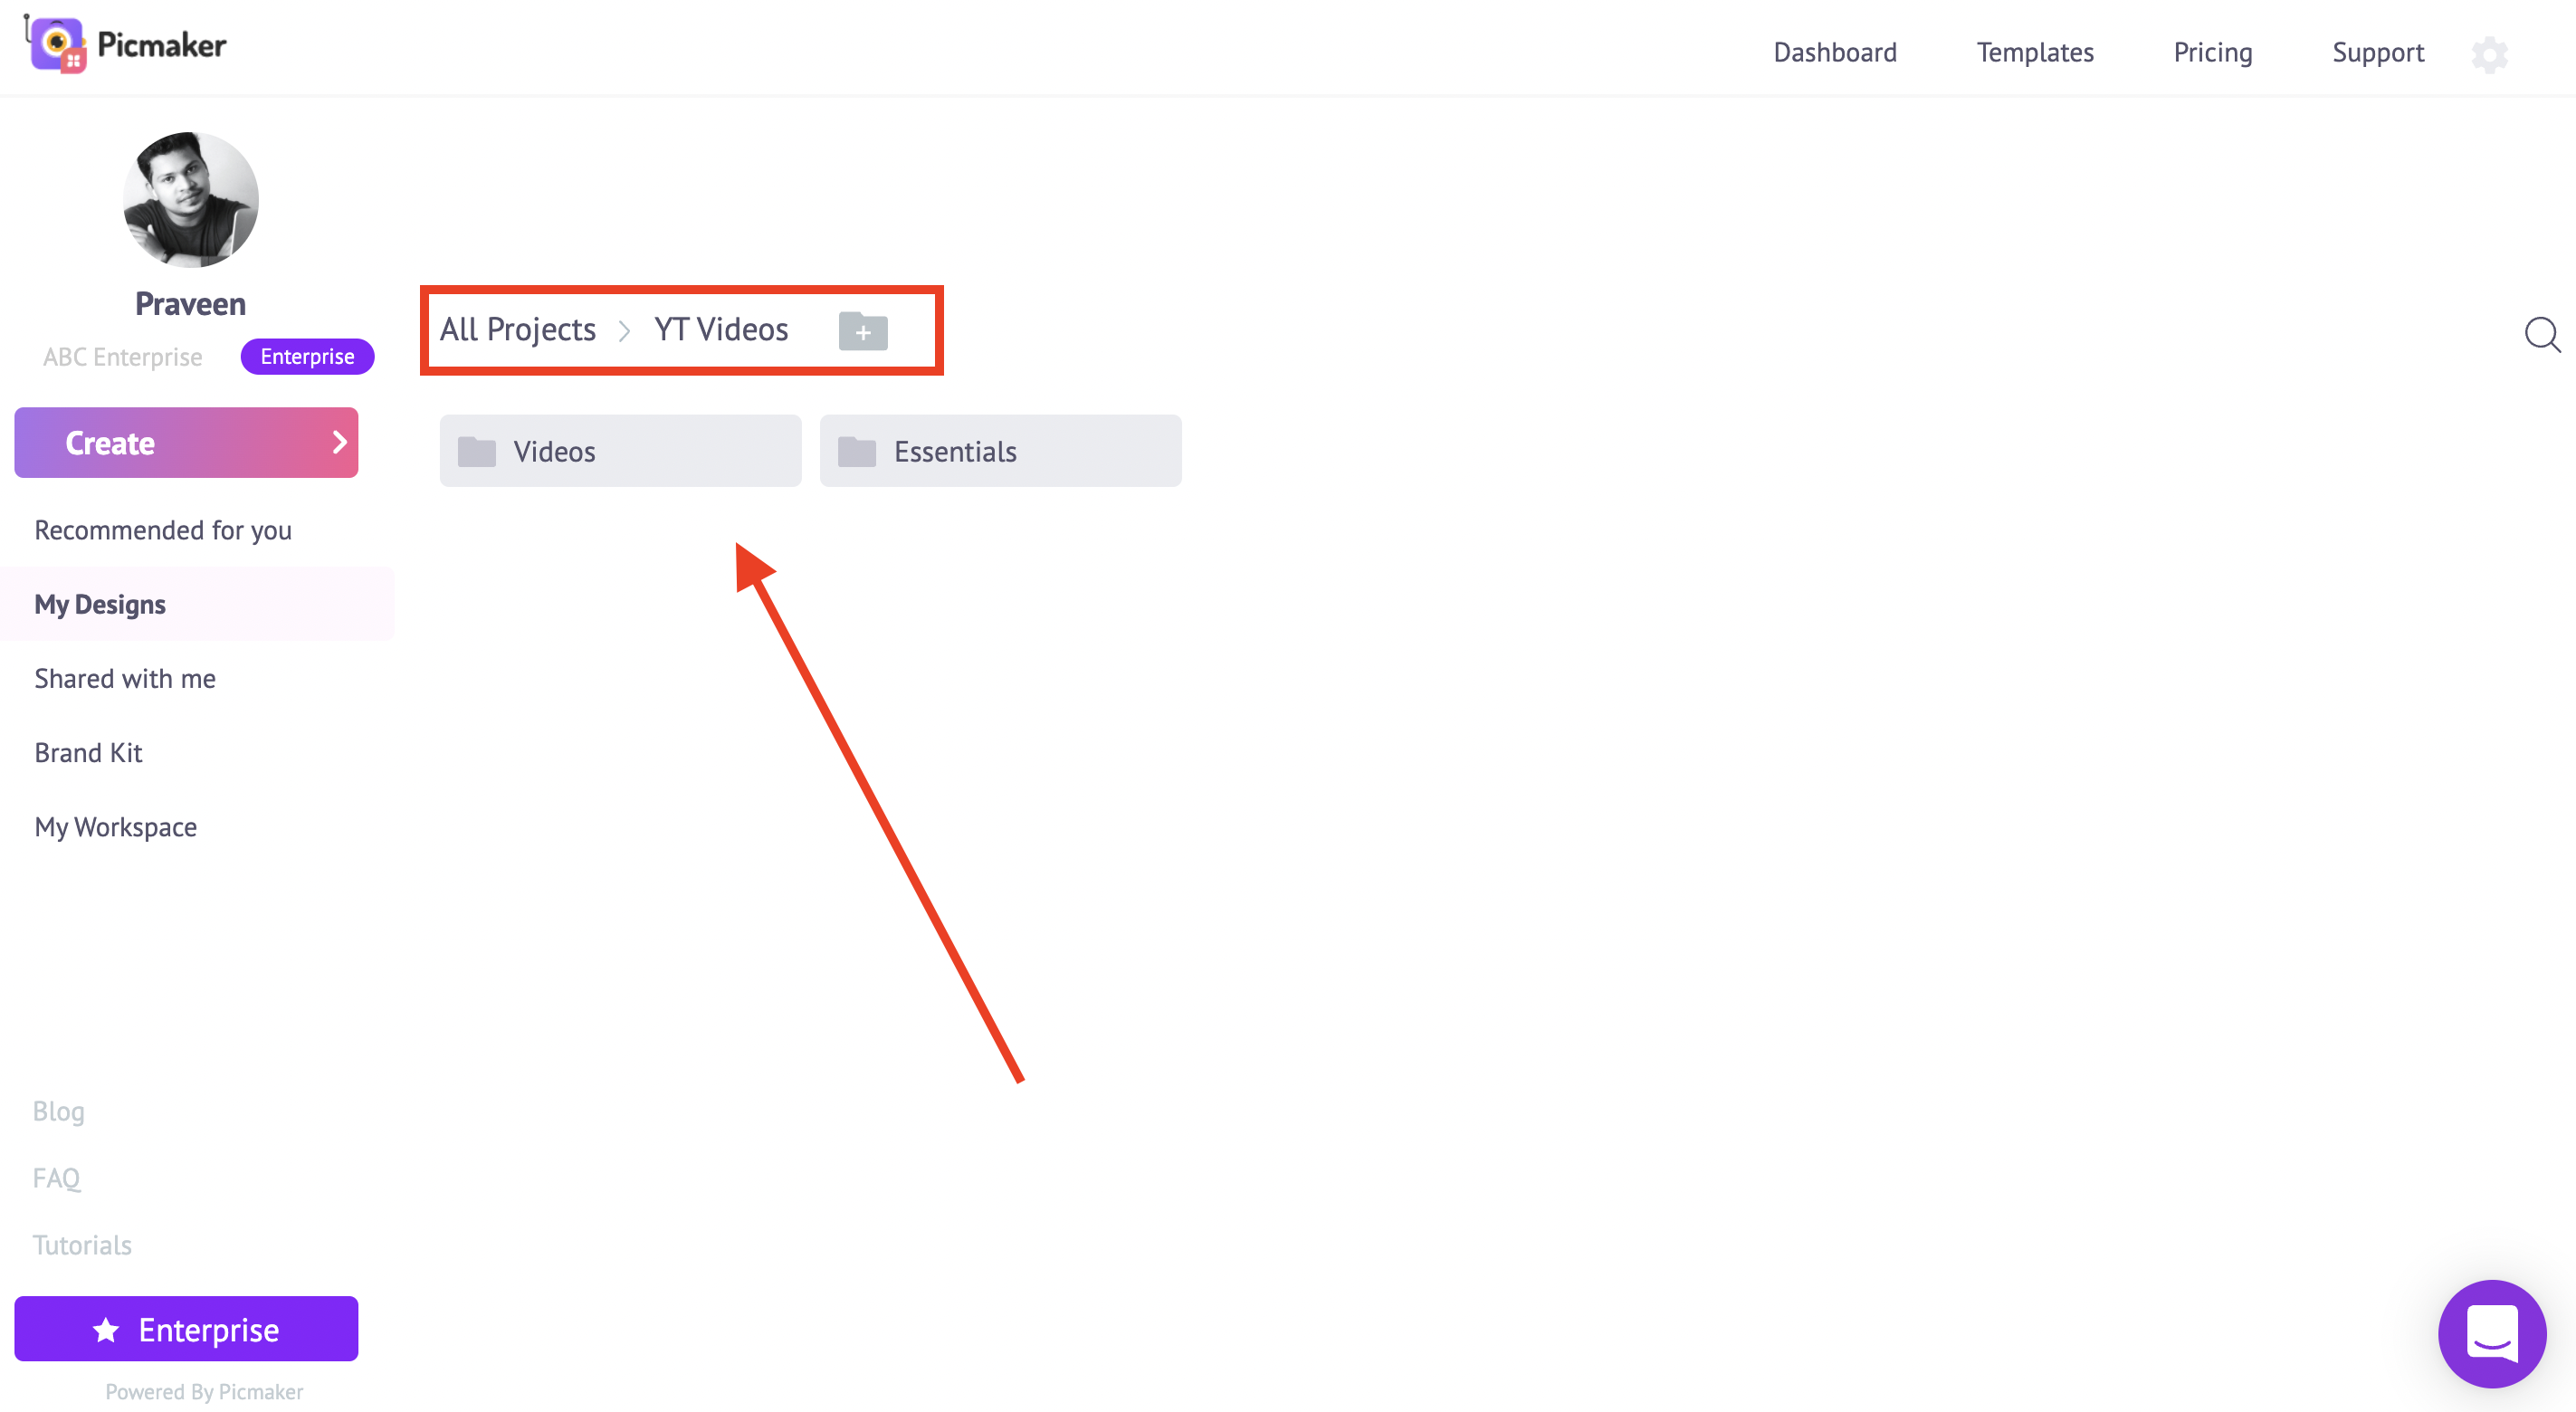
Create new folder
To create a new folder, click on the ‘+’ symbol next to the header named ‘All Projects’. You can assign a name to this folder and click on ‘create’ to create this folder.

Multiple folders
You can use the same approach to create multiple folders inside each folder.
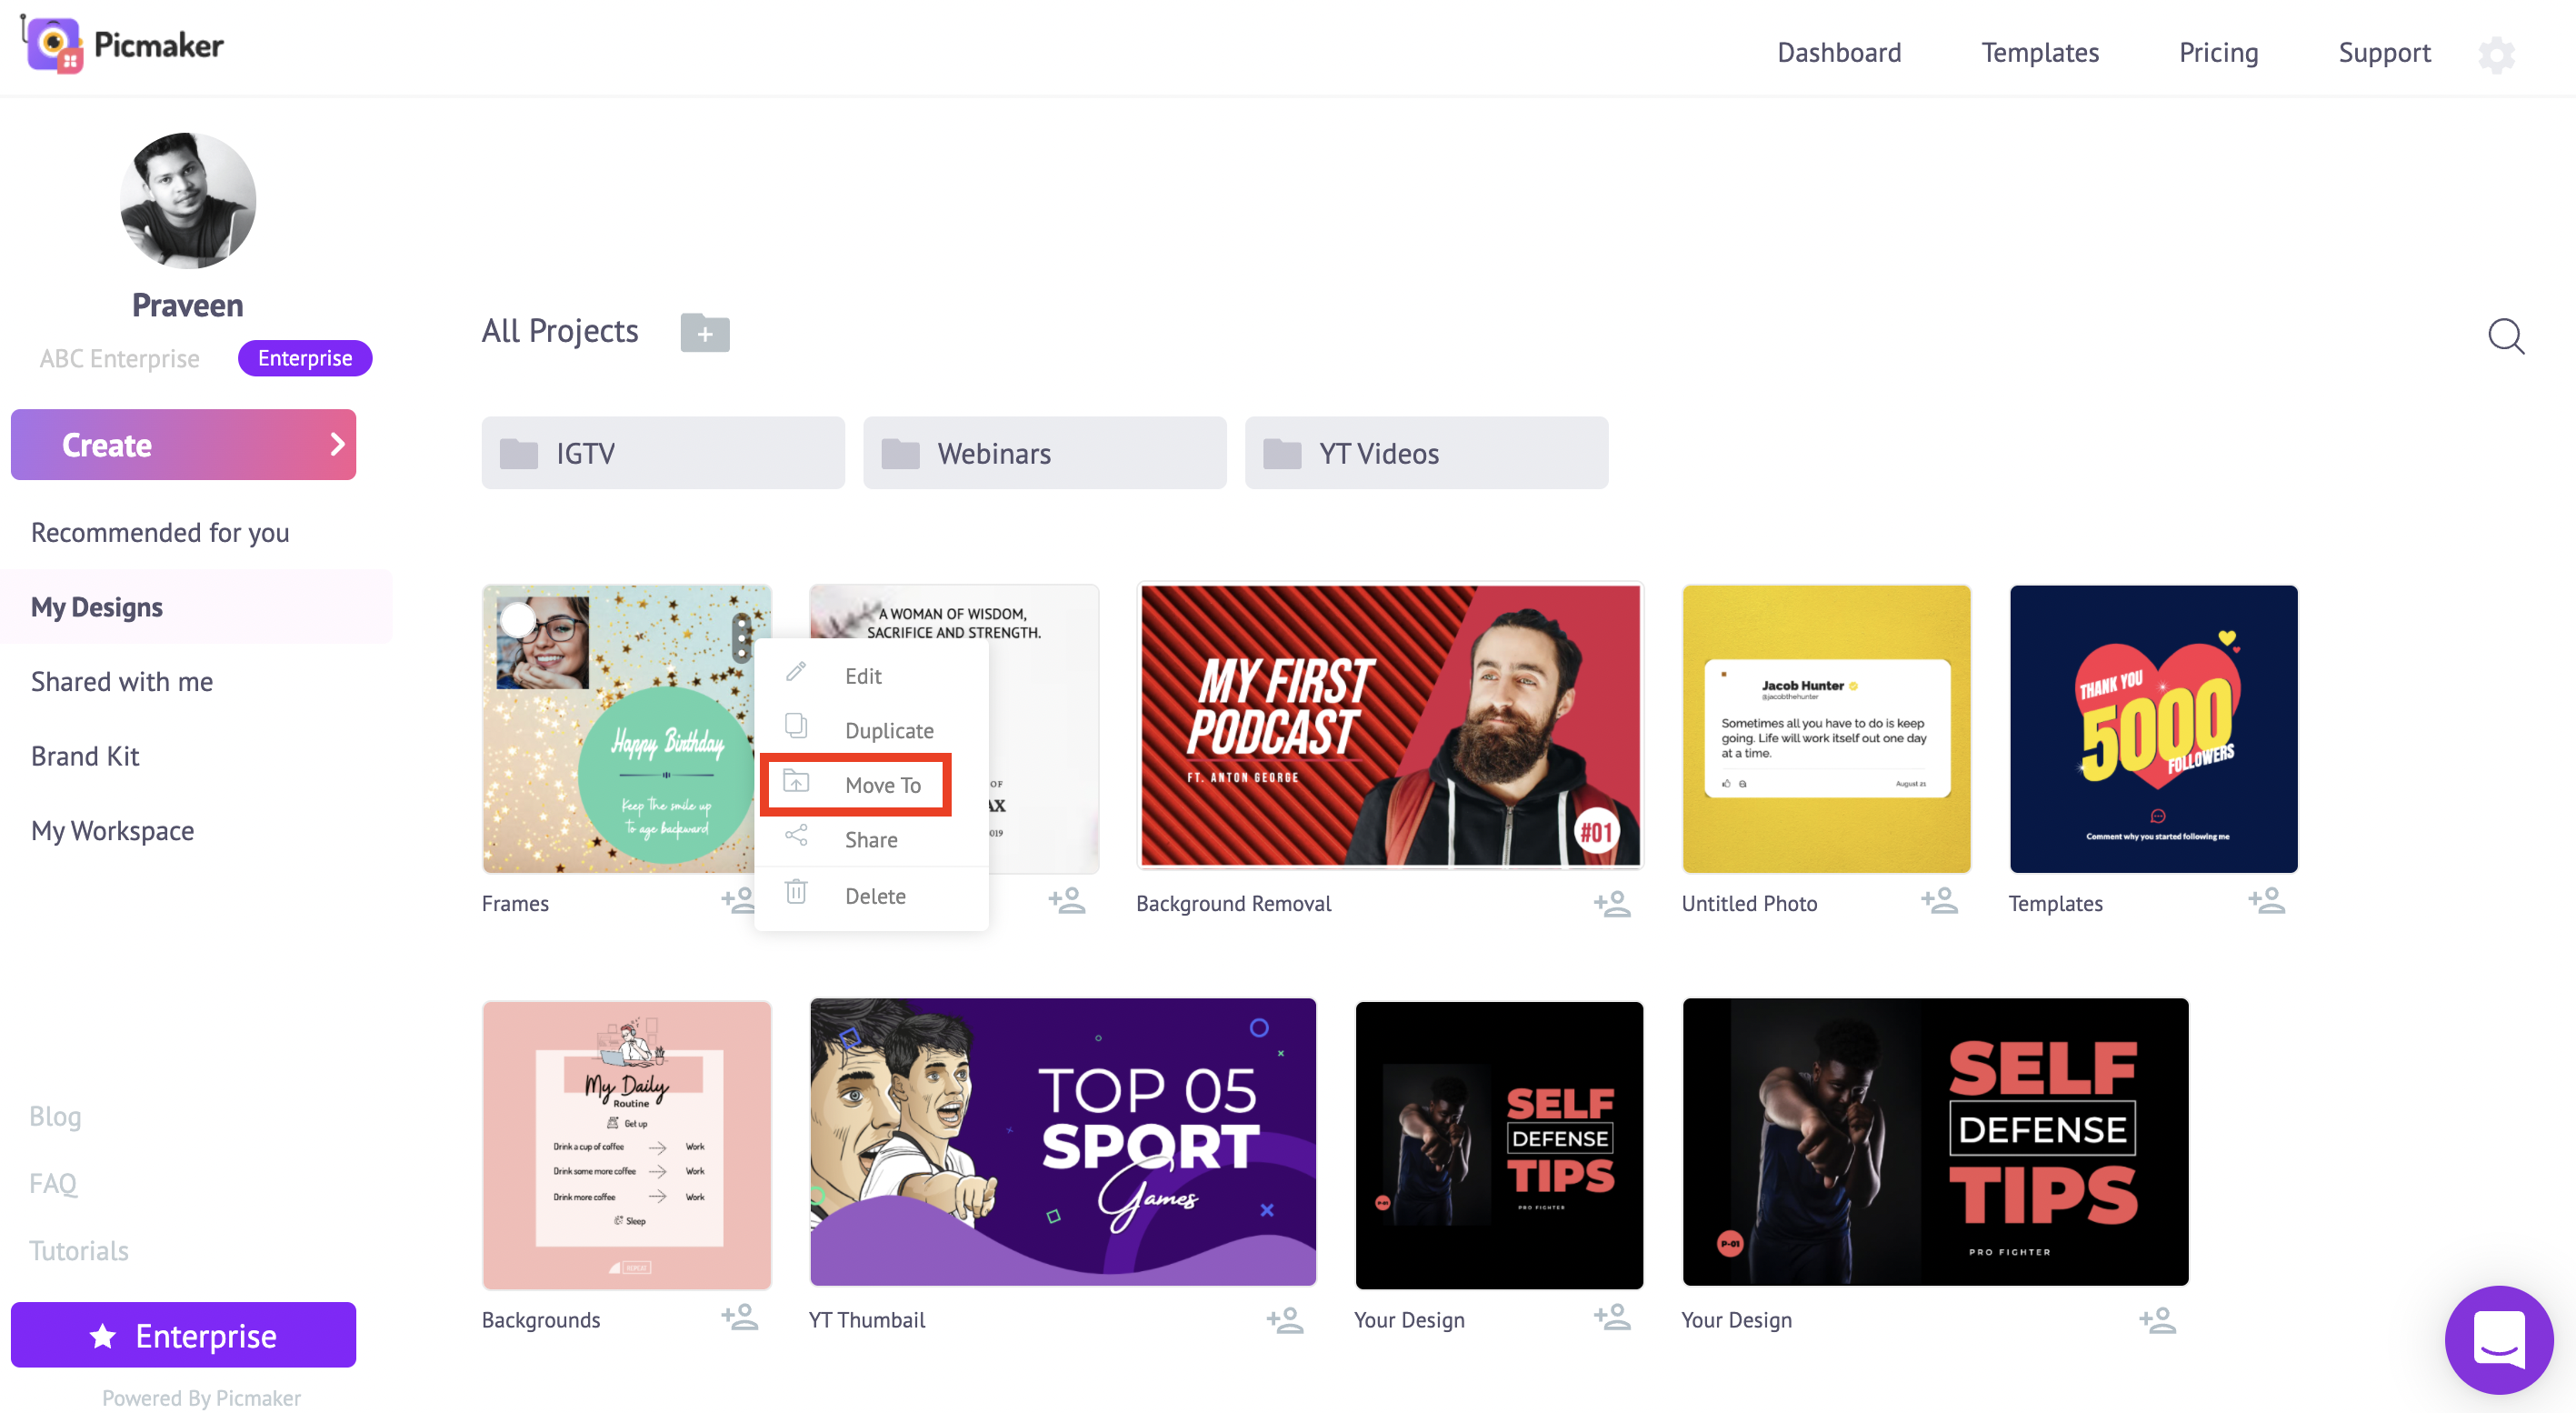
Move one design
To move one design inside a folder or a subfolder, hover over the design thumbnail and click on the three dots at the top right corner. Click on the ‘Move to’ option and select a folder to store your design.
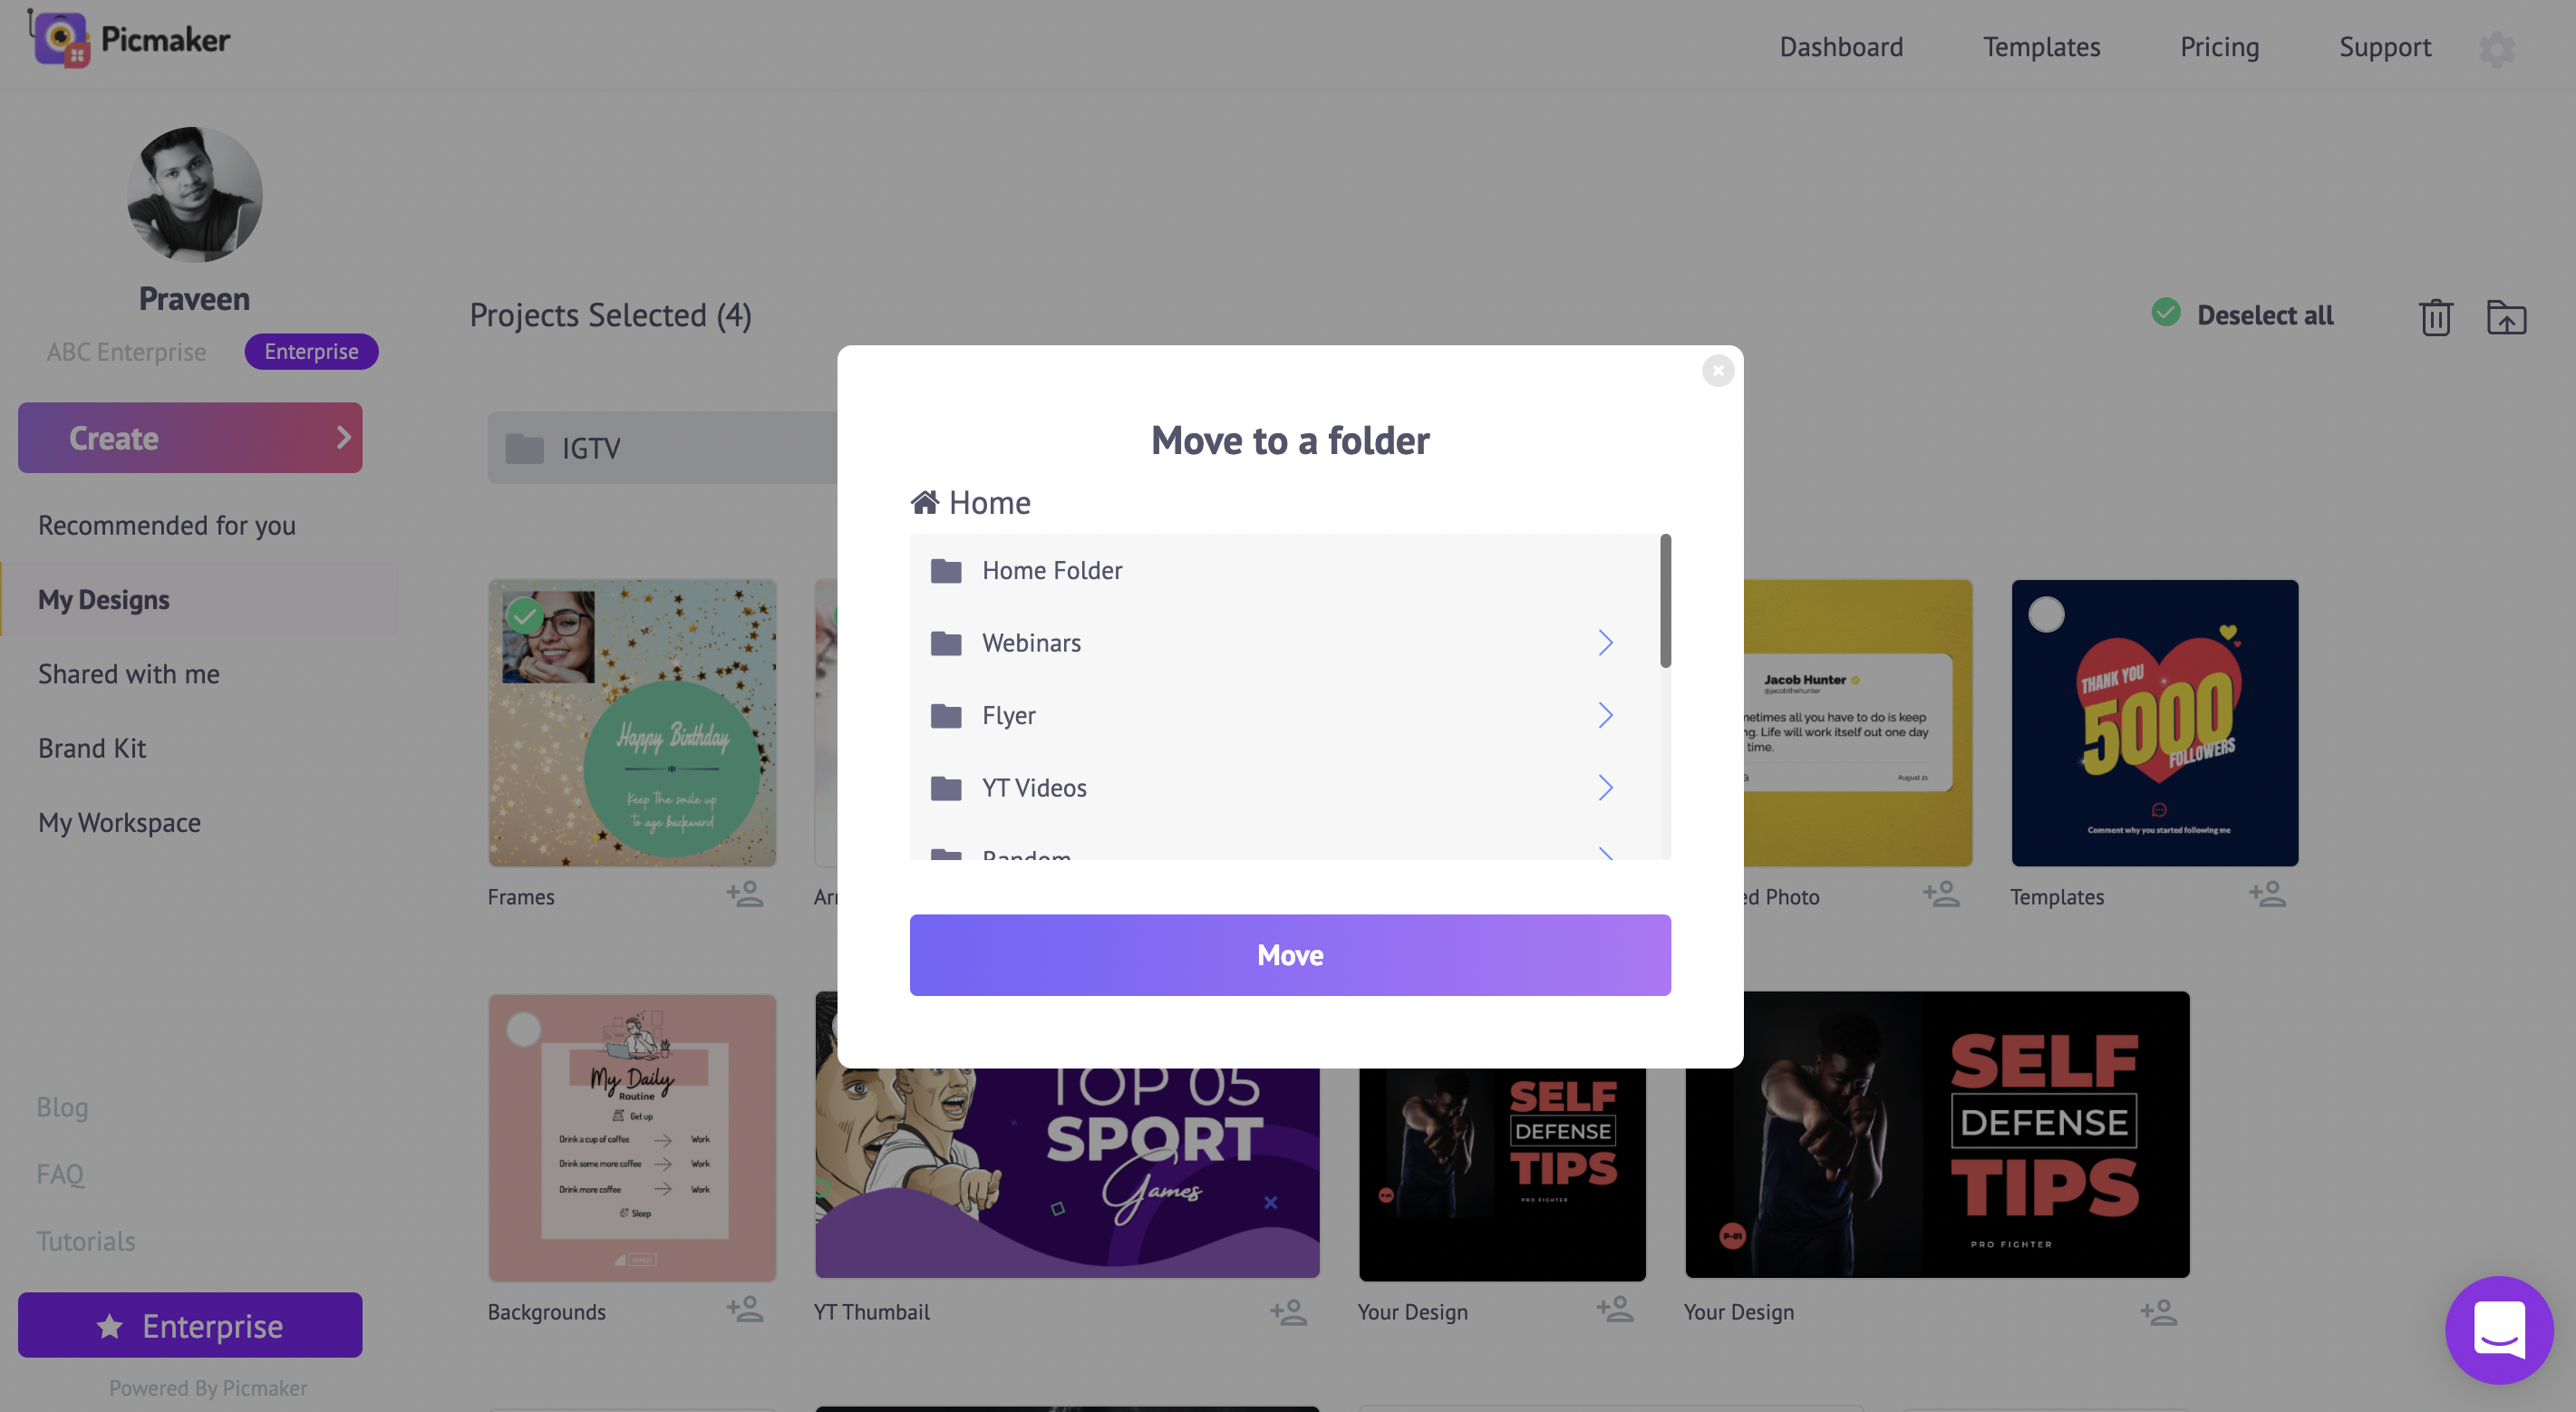
Move multiple designs
To move multiple designs inside a folder or a subfolder, select them by clicking on the white checkbox of the design’s thumbnail. Once you have selected all the designs, click on the ‘move to’ icon a the top right corner. This icon will appear near the ‘delete’ button and the ‘deselect all’ button.

Move
In the ‘move to a folder’ popup window, select your location and click on ‘move’.
To learn more about folders in detail, do take a look at the video embedded on this page.
We hope that was helpful to you.
Check out the below tutorials